Wow it has been quite a year, in July I quit my "normal" job and moved from Helena MT back to Huxley IA. You see back in 2000 my work transferred me from MT to IA, we ended up purchasing a home in a small town (Huxley) and living there for an additional 4 years. Then at the spur of the moment we decided to move back to Helena back in 2006, my husband had the chance to purchase a small convenience store...so we took the chance put our home on the market and moved back home to Helena. Five years later and after loosing several thousand dollars on the store, we still owned the home in Huxley. During these five years I had been working for a Greek company providing IT services to a specialized state agency (Lottery), even though I loved what I did and loved the people that I worked with (yes even the loud and boisterousness Greeks) I could not help being upset that we were renting a house in Helena when we owned a house in Huxley. After five years we decided to pack it in, closed the store and moved back to our home. I haven't worked since July (actually I tried to work at a large retail store and only ended up hurting my hand and wrist...what a disaster that was). So now I get to stay home, at least until I find a new job, and take care of my family. This means more time for paper-crafting, cooking, and photography. Actually the photography will have to wait, my camera won't turn on...ugh but that is another story.
I can't wait to get back into the swing of things and enjoy my time away from the 9a-5p (actually more like the 3am-2am)....
Tuesday, November 22, 2011


Sunday, January 23, 2011
All Tied Up Over You! - PKS Let's Face it Friday X's and O's
This is a valentine card that I made for the Peachy Keen Stamps "Let's Face it Friday X's and O's" Challenge.

Starting with an A2 size card made from Michaels Reflection Gem paper in Red.
Adding a 4"x5.25" cream mat.
Stringing red with white polka-dot ribbon onto the mat, adhering it to the back with tape.
Mounted the mat to the card.
Cut one 2.75" heart from the Designer Calendar hiding the "Be Mine" text when cutting the heart.
Stamped the face from my PKS Basic Doll set and colored in the tongue using my Martha Stewart Arts & Craft Marker Set.
Added cheeks to the face with chalk.
Added the phrase to the top of the card and weaved the heart between the ribbons.
Also added the XO sentiment at the bottom of the card after coloring the chipboard letters from Arts-licious.

Starting with an A2 size card made from Michaels Reflection Gem paper in Red.
Adding a 4"x5.25" cream mat.
Stringing red with white polka-dot ribbon onto the mat, adhering it to the back with tape.
Mounted the mat to the card.
Cut one 2.75" heart from the Designer Calendar hiding the "Be Mine" text when cutting the heart.
Stamped the face from my PKS Basic Doll set and colored in the tongue using my Martha Stewart Arts & Craft Marker Set.
Added cheeks to the face with chalk.
Added the phrase to the top of the card and weaved the heart between the ribbons.
Also added the XO sentiment at the bottom of the card after coloring the chipboard letters from Arts-licious.
Tuesday, January 4, 2011
Valentine Chocolate Tin, MPS Challenge
I created 4 Valentine Chocolate Tins for the MPS Design Challenge. Robyn is choosing two new guest designers for her blog over at www.mypinkstamper.com. For the challenge a new project must be created using the Cricut or Imagine and using Robyn's favorite colors of pink, green and brown.
Each tin will be lined with tissue paper then filled with hand dipped chocolates from The Parrot Confectionery in Helena MT (http://www.parrotchocolate.com/) and given to each of my kids for Valentines Day. Just like each of my kids, each tin is different. I used the same colors Pink, Green, Brown and White.


I started out with EK Success Lunch Boxes that measure 4.6" by 5.4". For 3 of the boxes I used Tim Holtz Adirondack Alcohol Ink in Watermelon and Citrus to color the base of the tins. The 4th tin was left white. Due to the nature of the Inks the two Watermelon tins each looks completely different, which is why this product is such a joy to work with.
I then used my Gypsy to cut two rounded rectangles from the Georges Cartridge for each tin. I used DCWV Sweet and Be Mine paper stacks. Each rectangle is cut at 4.88" x 4". This left a border around each side of the tin for a matted look.

I then used the following cartridges for three of the tins: Smiley Cards (heart face), Doodlecharms (Jar), Wild Card (heart), Accent Essentials (Flower). Each of these embellishments was cut from scrap paper in pink, brown, green and white. The flowers are layered with Pop-Dot between each one to give it a lift.

Each tin also includes a tag in shades of green with chalked edges in brown, the tags were embellished with a rub-on from American Crafts Mini Marks and 3 gems from I-ROCK. The sides of the tins are punched 3 times using my large Crop-A-Dile, each hole is then secured with a large eyelet (green for the pink and white tins, pink for the green tin). Through the holes I tied ribbon. The handles of the tins were wrapped in ribbon. Each tin sports 5 different ribbons.


One tin I created the words "Adore" and "Love" using Artsy-licious chipboard letters. I also used around the block Tags on two of the tins, each tag secured to the tin by a ribbon tied to the handle then draped over the front of the tin. One tin also sports a Vita Bella chipboard swirl by Yellow Bicycle, and a KI Softie butterfly clip.

Each tin will be lined with tissue paper then filled with hand dipped chocolates from The Parrot Confectionery in Helena MT (http://www.parrotchocolate.com/) and given to each of my kids for Valentines Day. Just like each of my kids, each tin is different. I used the same colors Pink, Green, Brown and White.

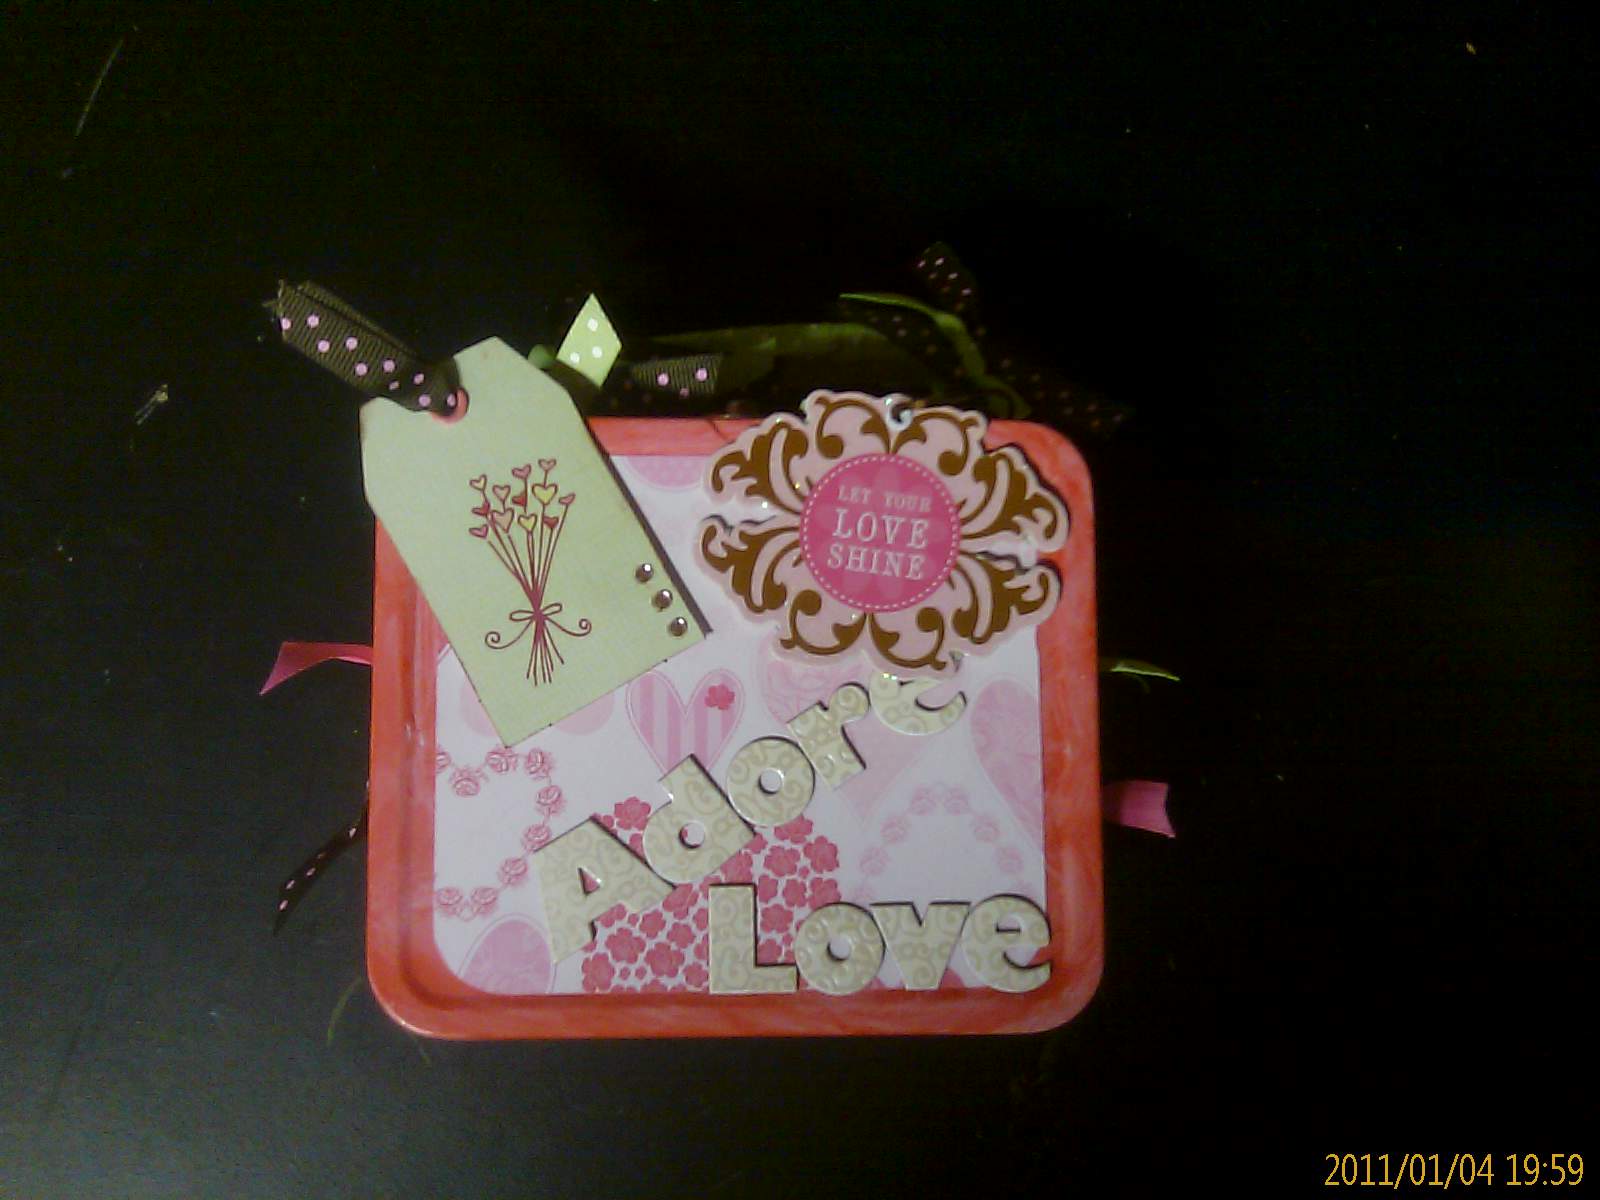


I started out with EK Success Lunch Boxes that measure 4.6" by 5.4". For 3 of the boxes I used Tim Holtz Adirondack Alcohol Ink in Watermelon and Citrus to color the base of the tins. The 4th tin was left white. Due to the nature of the Inks the two Watermelon tins each looks completely different, which is why this product is such a joy to work with.
I then used my Gypsy to cut two rounded rectangles from the Georges Cartridge for each tin. I used DCWV Sweet and Be Mine paper stacks. Each rectangle is cut at 4.88" x 4". This left a border around each side of the tin for a matted look.

I then used the following cartridges for three of the tins: Smiley Cards (heart face), Doodlecharms (Jar), Wild Card (heart), Accent Essentials (Flower). Each of these embellishments was cut from scrap paper in pink, brown, green and white. The flowers are layered with Pop-Dot between each one to give it a lift.

Each tin also includes a tag in shades of green with chalked edges in brown, the tags were embellished with a rub-on from American Crafts Mini Marks and 3 gems from I-ROCK. The sides of the tins are punched 3 times using my large Crop-A-Dile, each hole is then secured with a large eyelet (green for the pink and white tins, pink for the green tin). Through the holes I tied ribbon. The handles of the tins were wrapped in ribbon. Each tin sports 5 different ribbons.


One tin I created the words "Adore" and "Love" using Artsy-licious chipboard letters. I also used around the block Tags on two of the tins, each tag secured to the tin by a ribbon tied to the handle then draped over the front of the tin. One tin also sports a Vita Bella chipboard swirl by Yellow Bicycle, and a KI Softie butterfly clip.

Monday, December 27, 2010
Picturesque Tag Book
I created this tag book from my new Picturesque Cartridge that I received for Christmas (thank you honey!). I love the tags in the cartridge. They are so pretty and dainty. If you don't have this cart. you can use a gypsy or DS to design something similar. The tags are all cut at 5.75" which makes the length 11.5". Each page has a 4.5" by 6.5" mat attached.
The front cover is adhered to a plain tag, so is the back cover. I embellished the album with my I-rock, some prima flowers, small tags, and some green and blue ribbon. I also attached two small acrylic Tim Holtz tags to the binding clip, and used several rub-ons from the Swatch Book Impress-Ons collection. A few of the small tags in the album have also been punched using a corner punch from EK Success. I then added a small coordinating paper cut slightly smaller then the tag itself to give it that extra color.


The front cover is adhered to a plain tag, so is the back cover. I embellished the album with my I-rock, some prima flowers, small tags, and some green and blue ribbon. I also attached two small acrylic Tim Holtz tags to the binding clip, and used several rub-ons from the Swatch Book Impress-Ons collection. A few of the small tags in the album have also been punched using a corner punch from EK Success. I then added a small coordinating paper cut slightly smaller then the tag itself to give it that extra color.


Sunday, December 5, 2010
Christmas Tags
Here is one of 8 Christmas tags that I created today. I used the Expression and my gypsy to cut out the penguin. I used the hide-contour feature on my gypsy to not cut the eyes and beak lines. Instead I used my large PKS Basic Doll Faces to create the penguin's face. I then colored the tongue and eyes. I punched a hole for the ribbon (actually it is more like mini garland). I attached a small 2 inch tag to the back of the penguin and stamped the "to: and from:" on that portion of the tag. I also added a photo mounting square to the back to make adhering the tag to a gift easier.
I just love the way the penguin looks with the PKS face.

I just love the way the penguin looks with the PKS face.

Peachy Keen Stamps Challenge - Paper bag
I had some time, finally, so I decided to join in this week's Peachy Keen Stamps Challenge. I decided to use a paper bag as a base for a Christmas Tag/Card that will attached to some baked goodies. I used the same technique for creating a paper bag album but used only one paper bag.
I used one sheet of DCWV "The Homemade Christmas Stack". The front cover shows the To and From for the tag, the inside is left blank to write on. I did use my gypsy and expression to cut out two nutcrackers fron the Christmas cart. to use as embellishments on the inside of the card. I used 3 different types of ribbons on the tag/card, the first is tied into a bow on the front, another is used for the binding and the third is used to tie on two baking charms and for the mini-tags. I also attached a rolling pin charm to the front of the tag/card. Included are 6 mini-tags that will be used to write sentiments on. I will insert the recipe for the cookies into the paper bag opening. Each mini-tag is embellished with a Christmas brad an a Peachy Keen Basic Doll face, which they look great on, who says you can only use a face on a doll?
Thanks to Peachy Keen for the challenge is was fun, I can't wait to see what everyone comes up with.


Gigi
I used one sheet of DCWV "The Homemade Christmas Stack". The front cover shows the To and From for the tag, the inside is left blank to write on. I did use my gypsy and expression to cut out two nutcrackers fron the Christmas cart. to use as embellishments on the inside of the card. I used 3 different types of ribbons on the tag/card, the first is tied into a bow on the front, another is used for the binding and the third is used to tie on two baking charms and for the mini-tags. I also attached a rolling pin charm to the front of the tag/card. Included are 6 mini-tags that will be used to write sentiments on. I will insert the recipe for the cookies into the paper bag opening. Each mini-tag is embellished with a Christmas brad an a Peachy Keen Basic Doll face, which they look great on, who says you can only use a face on a doll?
Thanks to Peachy Keen for the challenge is was fun, I can't wait to see what everyone comes up with.


Four Cards using Gypsy and Expression
I created my daughter's birthday party invitations a few weeks ago and had some left over pre-cut papers....oh what to do with them? Makes cards of course.
I used my Gypsy to arrange all the cut pieces so they fit nicely using up as much of the scrap paper as possible.
I also used some ribbon, stickles, and I-Roc bling as accents.


I used my Gypsy to arrange all the cut pieces so they fit nicely using up as much of the scrap paper as possible.
I also used some ribbon, stickles, and I-Roc bling as accents.


Subscribe to:
Posts (Atom)